I’ve always had trouble printing images at exactly the right size (12cm for CD tray inserts, 8.6cm for photo cubes, etc.), because all this time I’ve been looking in the wrong place.
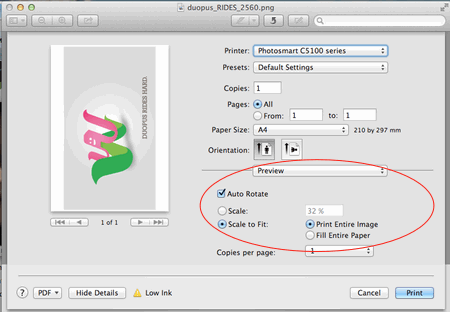
OSX’s print dialog (⌘P) in the Preview app has options to scale the image you’re trying to print, but trying to tweak the percentage scale factor to get the printed size exactly right is a nightmare of trial and error. This is that wrong place I mentioned above.

The right place is further upstream in the photo processing workflow. The print dialog looks at DPI information embedded in your image, and prints accordingly. If you want to print at exact size, you need to ensure that the DPI information gets added to your image when you resize and save it.
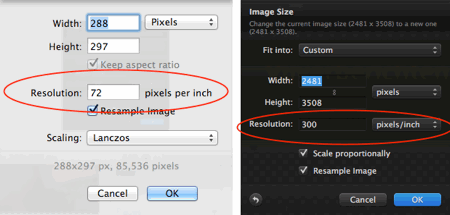
If you’re using Acorn, it’s the Image -> Resize Image… menu (⌥⌘I). In Pixelmator it’s Image -> Image Size… (also with the ⌥⌘I key combo).

In both cases, set the resolution to the resolution at which you want to print: typically 300 pixels per inch or 118 pixels per cm for a 2013-era inkjet. Then change the width and height and unit of measurement to what you want to see on paper, e.g. 12 x 12cm, and click OK to confirm. Now when you print, it will be at exactly the dimensions you want. Easy.
Can’t believe I’ve struggled with this since 2007.